Friday, February 22, 2013

Baby Quilts

Me with Jude at 3 weeks.

The finished quilt!

It's been a LONG time since I've posted. Much has happened in my life since the time of that post in early August, including a home sale and purchase, a move, and a new baby. There wasn't much time for quilting in those months, and now that I'm back to work full-time, I'm so exhausted most evenings that I doubt there will be a whole lot of quilting getting done in the coming months either. I'm sure that things will change with time and I'll once again find myself being a more productive quilter.

Quilt hanging above changing station.

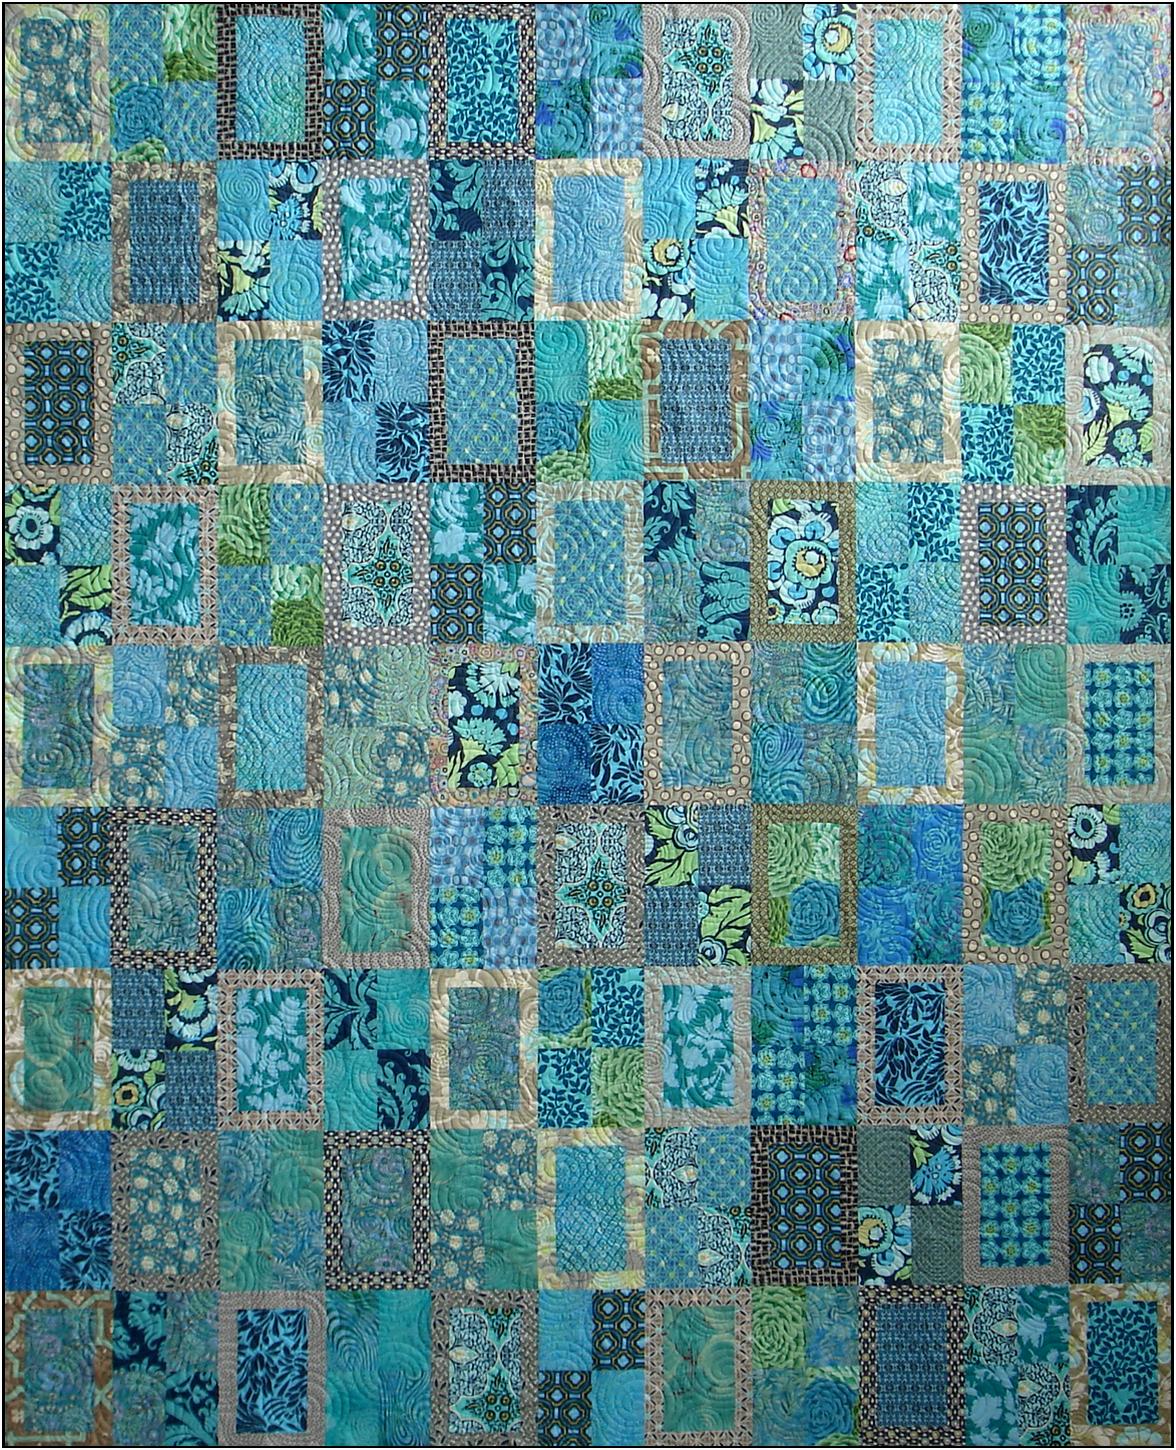
I did complete a number of projects in anticipation of Jude's arrival! Who doesn't love making quilts for babies? I started with a quilt to hang over his changing station. After thumbing through mountains of ideas, I settled on the Pink Lemonade pattern that appeared in American Patchwork and Quilting in April 2009. I opted to mix up the blues and greens throughout the quilt rather than isolating them by color along the diagonal lines. I also made the quilt about 50% larger than the pattern, as I hadn't realized that the blocks were rather small and the original only finished at about 34x42. Had I realized that before beginning my cutting, I might have sized the blocks larger, but instead I just made more of them.

I love the colors and the strong sense of line that the quilt exhibits. Jude seems to like it too. He spends a lot of time smiling at it when he is on the changing station and he stared at it from the floor when I had one of his activity mats in the room. Jonah had loved to look at the quilt I made him and I hope that Jude likes his too. It will be a learning tool of sorts in the future, as we will be able to talk about colors, shapes, and more.

Square quilt hanging above the crib.
I also wanted to have a quilt for Jude to play on. (After making all of those stars in the first quilt, I wasn't going to have him spitting up on it!) I stuck with something quite simple as an antidote to the more complicated first quilt. I had plenty of fabrics remaining, so I cut some of them into charms and then framed them with strips. I'd planned to frame the charms with 2.5" strips, but ended up feeling it was a bit too chunky, so cut down the first group and then cut the remaining strips at 2" or 2.25" wide (I can't remember and I'm not at home right now to measure). This quilt actually uses the Alexander Henry fabric called 2D zoo that inspired the color palette for both projects. While my initial plan had been to let Jude play on the quilt, I opted to hang it above his crib, at least for the time being. I do want my kids to snuggle up with and live with their quilts, but I also wanted to have something to brighten up that side of his room and to give him something to look at while he is awake in the crib (I don't think that really is all that much).

One corner of Jude's room, with giraffe prints, a book rack, and
his quilt above his crib.

We ended up settling on a giraffe theme for the room, but the "theme" is very loosely interpreted, as we weren't going to go out and purchase new bedding, blankets, and the like just to fit the theme. So we kept it mostly simple, with some giraffes showing in the quilt above, two giraffe-themed prints from Etsy (see photo at right, where they hang above the book rack), and a third, much smaller project that I designed with some able assistance from Ben.

Giraffe quilt, self-designed.
In our old house, Jonah had a small quilt on the door to his room and I had liked the idea of making one for Jude as well. So I aimed to make a simple quilt that would fit nicely on an interior door of a house. By this point, I knew I didn't have a lot of time for sewing and, as the project would need to be small for the door, I should keep it simple. So Ben helped me draw a giraffe, which I then appliqued (yes, I did actually applique!!!) and framed with small squares of the fabrics I used in the other projects. I LOVE the finished project, especially seeing all of the blue and greens dancing around the center. In the end, we aren't hanging this quilt on the door, as we couldn't bring ourselves to put a nail in the door at the new house. So it's hanging next to Jude's closet, where we can admire it just as much.

Finally, I have to give a shout-out to my dad, who made Jude a lovely wall plaque after his birth. Kudos to him for noticing the giraffes and making this precious art for Jude's wall. What a wonderful keepsake!


Thursday, August 2, 2012

Lorax Quilt

Completed Lorax quilt
Jonah has been a pretty big fan of Dr. Seuss' The Lorax for quite some time, though his tastes have widened quite a bit in the last couple of months. Thus, when I saw that Robert Kaufman Fabrics had a line out dedicated to The Lorax, I knew I needed to make Jonah a quilt.

I purchased the panels and a few of the prints without having a plan in mind.  I knew I didn't really care for many of the kits and patterns on the market as I personally find them a bit too busy for my tastes. After mulling some ideas for a while, I sprung into action so I could finish the quilt as a second birthday present for him. Ultimately, I opted to keep it simple, in part so that I could finish in a timely manner, but also so I didn't have to purchase additional fabric. In the end, I cut the panels to size and framed them with coordinating fabrics in the line, arranging in three rows of three and framing with a scrappy narrow border.

He was certainly excited when he opened it on his birthday (see pictures below) and he insisted for a brief period on having it on his lap when we read to him, but he has by now largely lost interest in it. I hope that changes as the weather grows colder and as he grows a bit older!

Wow - this feels so nice!
Checking out the front - look at these cool pictures from the book!
Climbing up on the table to get a better look!


Monday, April 23, 2012

Rear Window

I was shopping at Patched Works earlier this year and saw Blue Underground Studios' Rear Window pattern made up with white as the frame around the alternating blocks. As I am on a white in quilts kick (particularly for babies) and there have been and will continue to be a number of births amongst our friends and family, I impulsively picked up the pattern (I'm sure I could have figured it out on my own, but I was feeling lazy). 

Not too long thereafter, I was poking around on the Fat Quarter Shop website and came across the Bella Butterfly fabric line by Patty Sloniger. I really liked the colors, which both screamed "spring" and "baby" to me, so impulsively purchased them as well.  From the fat quarter bundle, I was able to sew two baby-sized tops.

I pieced the tops a while back while watching Downton Abbey, but then they sat while I focused on some other projects. I promised Jonah's daycare that I would donate something for their Week of the Young Child silent auction this week, so finally forced myself to load it to my quilting frame last weekend and meandered over the entire quilt with white thread. I really like the final product! I hope it raises so good money for the center and that the final recipient cherishes it for years to come. I'm hoping to get the second one quilted and out to a sweet little girl in the near future.

This quilt went together very quickly and I like how it works well with some of the larger scale fabrics that are on the market right now. I could see this becoming a go-to pattern for a quick and easy baby quilt.

Sunday, April 22, 2012

Superhero Quilt

The entire twin-sized quilt.
It dawned on me when visiting my sister's house at Christmas that my soon-to-be 5 year-old nephew really only had his original baby quilt from me, as well as a simple Sesame Street-inspired fleece that I sewed for his first or second birthday (I can't seem to locate a photo on my blog), whereas his younger brother received a more big-boyish quilt for his second birthday.  It was time to do something to rectify the situation!

Superheroes are very much on Alex's mind of late and it seemed an appropriate theme for a quilt for him.  However, there are only a limited number of superhero characters available in fabric right now, namely Batman and Superman. And the fabrics are rather graphic and busy.  How exactly does one use them most effectively?

Detail view.
I toyed with the idea of designing a few logos or the logo of his current favorite, Ben 10, and appliqueing them into the center of a design, but I don't really care for applique all that much, and I knew that I wouldn't be able to find matching character fabric for it. After much consideration, I decided the best route would be to find a pattern that would use large-ish squares that would let the novelty fabric shine. At this point, I recalled that Atkinson Designs' Slide Show pattern was a pretty easy sew and would allow the novelty fabrics to show (I made this small one up as a charity quilt last spring).  I purchased fat quarters online and decided to use a navy lattice to bring things together for the twin sized quilt. I love the scattered solid squares of yellow and red that pick up the colors in the novelty fabrics.
Another detail view.

Trudie Hughes quilted this one for me with navy thread in a very linear pattern I selected and turned it around in 24 hours, which meant I was able to ship it to Ohio in time for Alex's birthday yesterday. I hear that he was pleased with it (and was impressed that it included BOTH Batman and Superman). Score!!! I have a ton of extra fabric left over from the backing (I discovered I could cut the fabric in the opposite way and it used significantly less yardage), so when I get to it, I think I'll whip up a couple of matching pillowcases.

Tuesday, March 13, 2012

Row By Row

I'm not sure how many quilts Jonah will have by the time he is grown, but I imagine it will be several.  I often see patterns and think that they would be perfect for him, but I know that time and need are both limiting factors.  Nonetheless, I began a second quilt for him during a retreat in Door County last March. At that point, it was my first time away from him outside the work day and one brief date night, and I think it helped to be working on a project specifically for him.  I'd seen the Lollipop fabric line by Sandy Gervais that featured a cute panel with a monkey on a bicycle and I thought Jonah would enjoy it:

The panel that started it all.

Knowing that the panel would finish up smaller than what I wanted for the space above his changing station, I opted to buy the panel and coordinating fabric for a larger quilt.  Well, here we are a year later, and the panel still hasn't been made into anything (I do have a cute pattern design for using it now!), and I'm finally getting around to posting pictures of the quilt I started a year ago and completed last summer.  Better late than never!

The February 2011 issue of American Patchwork & Quilting had a pattern called "Row by Row" by Sandy Klop that I liked and thought would be fun.  It's a pretty traditional pattern, but one that I thought could grow with Jonah over time and would be made more modern by the colors and fabric design. Here it is, all done up:

The finished quilt.

I had Patched Works quilt this one so I could get a fun monkey and banana pattern in the quilting that I didn't feel ready yet to attempt on my own.  I think you should be able to see one of the monkeys in this close-up view:

Detail view showing monkey and banana in the quilting.
The quilt has been hanging over Jonah's diaper changing station for some time now, and he will often point out the dots and letters and different colors on the quilt. It is so darn cute to hear him say "qwee-ilt!" I took it down recently to measure it for the quilt show this weekend and to put on a temporary sleeve. You can tell he notices that he is missing, which really means a lot to me. I love making his room brighter and creating projects that will be keepsakes in years to come!

Tuesday, January 31, 2012

Dora

The finished top!
This baby quilt has been a while in the making as well, though not quite as long as my previous post.  I began it at quilt retreat in November, but was unable to finish it at the time as I needed to order backing, border, and binding fabric.  Have I mentioned that I really like to use white in baby quilts of late?  I do recognize that it is not necessarily the most practical color to use for babies, but at the same time, I do associate white with babies. Perhaps it is the idea of newness and a clean slate, etc.
This pattern, Dora (which I assume has nothing to do with the television show), is from the Leisure Arts book 3 Times the Charm! by Barbara Groves and Mary Jacobson of Me & My Sister Designs. This $10 book has a lot of great ideas and I have a feeling I will use it a fair amount for smallish baby quilts in the coming years.  I chose the Kate Spain line Terrain as I loved the bright colors and designs and hoped that they would be fun for both mom and baby, providing some visual interest to look at.

The pattern in the book used a setting of 5x5 blocks, but I chose to make the quilt a bit larger, with a 7x6 setting and a slightly wider border (6" versus 3 1/2") to show off the large-scale print. I hadn't realized how much of a line the border fabric had to it until I had cut the print and applied it!  My finished version of the quilt is approximately 42"x38" (book quilt finished at 30 1/2" square).

I quilted the center part of the quilt with white thread and chose a pink thread to meander with in the border.  This was the first time that I used two different threads and rolled the quilt through the frame more than once.  Needless to say, the pink thread required some tension adjustments and I had to rip out a good portion of a row of quilting after I discovered the tension issue. Note to self: check on the tension more frequently to avoid this in the future! Ripping quilting out while it is loaded on the frame is painful work (in more ways than one). In the end, I think I could have meandered the entire piece in white and it would have been fine, but I now have more confidence in my ability to do some thread changes on my frame.

This quilt is in the mail and I hope the recipients love it!  It sure feels good to be finishing up some of these projects that have been lingering on my sewing table.

Call Me Crazy!

Finished quilt with sashing between all blocks.
This quilt has been a little while in the making.  I began it in a workshop with Weeks Ringle offered through my quilt guild in May 2011.  I enjoyed being able to use some wonderful blues from my stash to crazy piece (improvisational sewing) fabric for the blocks, and working from my scraps allowed me to reflect upon and remember previous projects that used some of the same fabrics.

In the end, I didn't end up following instructions terribly closely, however.  Blocks were supposed to be trimmed to 6 1/2" square, but I made a error with my ruler, so they were all trimmed at 5 1/2" square. No big deal, right?  I further departed from the instructions provided in the workshop as the blocks were to be set side-by-side in rows and I decided I preferred to sash them all white.  Finally, I opted not to use the super-wide 7 1/2" border around the entire quilt, choosing instead a 3 1/2" border, which was closer in size to the 2 1/2" sashing strips I employed.


Quilt as pattern directed.
I quilted it on my frame in the basement, meandering over the entire piece with white thread.  Aside from running out of thread in the bobbin a couple of times, I didn't have any problems, thankfully.  I washed the quilt in Dreft after binding it and love how the cotton batting puffs up after a wash.

In the end, my quilt finished at approximately 47" x 57", a bit smaller than the napping size the pattern finished at 50" x 73"!  In my mind, it's just the right size for a baby boy and it's off on its way as of this morning.  I hope he enjoys it a lot (even if it is months late), and that his mama will let him love and play with it (yes, I do know it is white!).


Closer view of the quilting.

Sunday, August 21, 2011

Shimmer

Amy and Tim open the quilt!
I've been wanting to make this quilt called "Shimmer" from the February 2004 issue of American Patchwork & Quilting for a long time (since the magazine debuted). Ben and I decided that it would be a good pattern to make as a wedding gift for Tim and Amy, and with a bit of a last-minute push, I was able to finish it in time.  Their wedding yesterday was beautiful (at least what I saw of it, when I wasn't rushing out with a screaming Jonah), and we gave them the quilt this morning. I hope they enjoy it for many, many years to come!
The full quilt (queen).

Close-up view of the quilt.
While I personally liked the pattern, I didn't much care for the color palette used in the magazine and decided to make it entirely out of batiks for a more contemporary look and feel.  I was able to make the entire quilt (except backing) from my stash, which was an added bonus and probably attests to my need to continue my fabric "diet."  The pattern itself was well written as it appeared in the magazine, though had I actually purchased fabrics following their materials list, I think I would have been a bit put off by the excess they wrote into the pattern (I was able to get nearly twice as many stars from the yardage they suggested).

I did my best to work within a color palette of blues, purples, blue-greens, and burgundies, and I'm guessing there are somewhere in the neighborhood of 40 or more different fabrics in the quilt, as most of the fabrics I used were fat quarter cuts.  I realized later on that I could have used some left over jelly roll strips, as some of the units were based on a 2.5" grid.

The label, using a bit of leftover fabric to tie to the design of the front.
While I normally choose a cotton batting, I opted to use wool this time and may be a convert, as the loft and feel is nice.  In this case, there wasn't a huge difference in price due to the size of the quilt and the widths in which the battings are sold.

I have four extra blocks left over (they are large, at 19" square) that I plan to sew up into a separate project, perhaps for one of the handmade gifts I promised in a Facebook challenge earlier this year. We'll see whether I can bear to part with them.


Wishing Tim and Amy many, many years of happiness!

Friday, August 5, 2011

Convoy

The full quilt.  Isn't Ben doing a great job holding it up?
My nephew Grant turned two late last month and I made him Convoy as a new "big boy" quilt (I made one at the time he was born too).  The pattern is from The Buggy Barn book "Those Crazy Kids" and when I saw Lisa Garms' completed quilt, I'd known it would make a great quilt for one of my nephews. I picked up the supplies and pattern not long after Grant was born, using gift certificates that Mom and I received from a quilt shop hop to help offset the costs of the supplies.
 
Given that I have much less time to quilt these days, I began work on the top during the Door County quilt retreat I attended in March. I liked the pattern a lot in that it involved a fair amount of piecing, and the Buggy Barn instructions were excellent, as usual.  It was a bit down to the wire, but I dropped off the top to have it quilted at the end of June (I had made a reservation for the quilting; I'd wanted to have a fun pantograph used on it and I'm only up to meandering on my own frame). I sewed the binding down while on the drive to Ohio for Grant's birthday party and the label was applied at Mom and Dad's house after we arrived there.
Detail view #1.


Detail view #2

The label Ben designed.

Those who know me well might have been surprised that I chose to make this pattern, as applique of any sort really isn't my thing. That being said, there are an awful lot of really cute patterns for kids that feature applique, so I figure I'm going to continue to work on my skills in that area and push myself to the limits of my comfort zone. I don't intend to become an expert needle-turn appliquer, but hope to at least be somewhat competent at machine applique.

Happy birthday, Grant! I hope you love your quilt!  (And I'd best think about getting your big brother a "big boy" quilt lest he become too jealous!)

The birthday boy with his quilt.

Thursday, April 14, 2011

Slide Show

Slide Show quilt, completed for West Suburban
Quilters' Guild charity challenge.
I was undecided about completing a charity quilt for this month's quilt guild meeting.  We've been given a fat quarter of fabric at the September meeting and were told to incorporate it in our finished product. I wasn't particularly fond of mine and also was afraid to commit myself to completing a project because it's more difficult to calculate how much free time I might have these days. 

Around about the 2nd, I decided to fiddle around in my stash and patterns to see what I could come up with. I figured if I chose something simple and worked with what I had, I might be able to get it done in time.  I told myself I wouldn't stress myself out about getting it done, but would do my best (more on that later).


I opted to use Atkinson Designs' pattern, Slide Show because it was simple and I was able to pull everything but the backing and border from my stash. The top went together really quickly and I ran into the quilt shop on a weeknight after work to pick out the border and backing fabric. I wasn't totally in love with it, but it was the best I could do in the time I'd allotted and with a husband and infant in tow! I loaded it on my frame last Saturday night and thought I was pretty good to go, but suffered a bit of a setback when I discovered I had to rip out the majority of a row of quilting due to tension problems.

At that point, I didn't think there would be any way that I could finish a charity quilt in time for last night's guild meeting.  I had a number of other commitments and didn't want to stress myself out too badly.  However, I was so close to being able to finish that I couldn't stand it.  I stayed up just a bit later, had Ben watch Jonah himself a bit longer, washed the quilt to try to hide some of the needle holes from the stitching I had to rip out, etc. and was able to drop the quilt off with Kelli on Tuesday night because I wasn't able to go to the guild meeting last night myself.  I'm sad I wasn't able to see what others did with the challenge fabrics (mine was the multicolored print in the lower left hand of the photo below), but am hopeful that images will be posted to the guild site.

My challenge fabric was the multicolored print in the lower left.
As usual, the Atkinson Designs pattern was well-written, easy to follow, and a pleasure to sew.  It was a great way to do a bit of stash busting too! Hopefully the recipient loves this quilt and feels its warmth in more ways than one.

Monday, March 7, 2011

Confetti!

I'm beginning to figure out how to manage time for sewing in addition to caring for little Jonah, working, and doing all of the other things adults have to do.  I have a number of works in progress that I should be able to blog about soon, but I'm very excited to share this quilt because it is one that I pretty much began (and finished!) this year and it's also the first non-practice quilt that I quilted on my own quilting machine!  Granted, I just quilted it with a meander, but still, it's a learning curve to switch from the domestic sewing machine to the midarm (plus, I had to sew the darned leaders for the machine, which definitely did not motivate me)!


The full quilt.  I really love white quilts and bright colored bindings!

The quilt I just finished is called Confetti, from the book Four Patch Frolic by Barbara Groves and Mary Jacobson of Me and My Sister Designs.  The pattern was sized a bit larger than what I wanted for a baby quilt, so I just bought two charm packs and sized it to a more baby-ish size (44"x53"), using their fabric line, Dilly Dally.  I quilted it with white thread on top and bottom.


Close up showing some of the quilting.

This quilt is set to go out in tomorrow's mail to a new baby, born Jan. 3 (only 2 months late, but better late than never, right??).  Hopefully she enjoys it!!!

Here's some video Ben captured when I first tried the quilting machine on a test quilt sandwich. Looking forward to doing more soon!

Tuesday, November 23, 2010

My Family Quilt


I've been on a bit of a sewing and quilting hiatus, as the arrival of Jonah Robert on June 28th commanded the vast majority of my attention.  Now that he's a bit older and is sleeping longer stints through the night and going longer between feedings, I've been able to make little pockets of time to work on some craft projects.  At the top of my priority list was a project for Grandma and Grandpa's 60th wedding anniversary, October 1.

While Gabby was out and we were at the IQF in Chicago in April, we visited a booth with a display of a quilt called "My Family Quilt" from the Whimsicals book, If Quilts Could Talk. While it featured applique, a technique of which I am not fond, I thought it was perfect as the pictures printed to fabric and text were appropriate for a 60th anniversary, and the size was such that it didn't seem too overwhelming.  Gabby was kind enough to buy the book for me as a gift, and I began thinking about what exactly I might want to do with the project.

I started on this very shortly after Jonah was born, but it has taken me until Sunday to completely finish it.  The main challenge was in getting the blasted photos printed to fabric.  It should NOT be that hard, but our home printer - the ink jet one required for printing to fabric - was having major issues and refuses now to render color properly.  I took the files to work to print on the printer there, but the files were corrupted somehow in the process and I had to recreate them all.  Then, when I was finally able to print again, I discovered that the work printer was also refusing to render color properly.  So the project sat and sat until Ben was able to print them on the neighbor's printer (thank you a million, Kathy Cayen)! From there, it went pretty quickly in terms of the construction.


I used almost exclusively Daiwabos and Daiwabo scraps from my stash.  The trims were purchased from Etsy (thanks to Susan Sponberg for her suggestion to look there).  I'd purchased additional trims, but to be honest, wasn't exactly sure how to apply some of them.  And others had means of application that were just too large for the scale of this project (most of these images are in the 2-3-inch square range and the entire project is about 40" wide by 16" tall).  I love the oversized rick rack, one of several color options I purchased from Tammy Tadd Designs, and the manner in which the border, rick rack, and center were applied was really slick, even if it does "waste" fabric. The rick rack just lies so flat!!

I presented it as a gift to Grandma and Grandpa this morning, and I think they loved it, even if it was nearly two months late.


Sunday, June 27, 2010

Lil' Twister

As I'm not entirely certain when my sewing time will come to a halt, I've been working on finishing up some projects and starting only smallish projects. Or at least I've been trying to motivate to do so.  I did drop two quilts off at the shop yesterday to have them quilted - the State of Grace quilt I finished last week and the Just Before Dawn top that I finished a year ago May and have just had sitting around! 

I'd picked up a pattern and template called Lil' Twister (by Country Schoolhouse Designs of Superior, WI) at the IQF show in Chicago in April and thought it looked simple enough to give a start.  You begin by sewing together charm squares in a pleasing arrangement with a narrow border, like so:


And then you use the template to cut squares out from the sewn piece to give the illusion of pinwheels, like so:


Not terribly difficult to do, but I'm wondering if it wouldn't have looked better with fabrics with more contrast.  I do love the Martinique line by 3 Sisters that I used, but the pinwheels aren't necessarily all that apparent. Once I sew the blocks together, I'm thinking of adding on a narrow cream border and a slightly wider red border to finish it off and brighten it up a bit.

Tuesday, June 22, 2010

State of Grace

I've squeezed in a bit of sewing here and there for the past several weeks, working at a project that I''d had sitting around and cut out for some time. It's the State of Grace pattern (a Moda to Go jelly roll project) using the Shangri La fabric line by 3 Sisters.  I'm thinking that part of the reason I'd set the project aside (because I love the colors and design!) was that I had come up way short when I originally cut it out from the jelly roll. The good news is that I had significant portions of a jelly roll of a more recent line by the same designers - the Glace line - that mixed and matched well enough to allow me to finish the top.


Here's the full quilt (poor Ben did his best to hold it up, but it's on the larger side):


And a close-up.


I love the colors and can't wait to get this one quilted.  Ordered some backing fabric and might be able to drop it off this weekend.  Time will tell, though.

Thursday, June 10, 2010

Bathtime Hoodie

At our guild's show in March, I purchased a really cute pattern for a baby bathtime hoodie, designed by RoseHip Lane (two guild members joined forces as this creative duo), along with the yard of toweling required to make it.  On Sunday, I finally made time to sit down to make it up, using 2.5" squares left over from baby's Pearls 'n Pinwheels quilt (isn't it fabulous when you can directly incorporate pieces from one project into the next?). 

I love how quickly and easily it came together and plan to stock up on toweling so that I can make more as gifts in the future.  The most time-consuming part is sewing down the binding and trying to keep the thread from being visible on the opposite side through the toweling (I wasn't always successful at that).

Monday, June 7, 2010

Sailboat Panel Quilt

When Mom and Dad were out a couple of weeks back, Mom pieced a quilt for the nursery to go with the sailboat theme.  We found the pattern and panel at the Fat Quarter Shop. It's the Nautical and Nice line by Sandy Gervais, which matches the Anchors Away hanging I made a few months back. Unfortuantely, due to all of the activity of the weekend, we ran out of time for layering, basting, and quilting the quilt before Mom headed back to Ohio, but I was able to finish it up this weekend so it's all set for the baby's arrival.

Here are a couple of photos.

The full quilt, hanging on the wall:

 Just the center portion of the quilt:

Thanks so much, Mom! He's going to love it!